Creating RAID 1 (Mirroring) in Linux
Configure Software RAID 1 in Linux


# mdadm --detail /dev/md0


Next, verify that the device /dev/md0 is mounted under /raid1 directory.
#df -hT

Once you’ve verified mount points, it’s time to create an fstab entry in /etc/fstab file.
# vim /etc/fstab
Add the following entry as described. May vary according to your mount location and filesystem you using.
/dev/md0 /raid1 xfs defaults 0 0
Run mount ‘-a‘ to check if there is any error in fstab entry.
About RAID 1?
RAID-1 is usually referred to as "mirroring." Each child object in a RAID-1 region contains an identical copy of the data in the region. A write to a RAID-1 region results in that data being written simultaneously to all child objects. A read from a RAID-1 region can result in reading the data from any one of the child objects. Child objects of a RAID-1 region do not have to be the same size, but the size of the region will be equal to the size of the smallest child object.
Requirements
Minimum Two number of disks are allowed to create RAID 1, but you can add more disks by using twice as 2, 4, 6, 8. To add more disks, your system must have a RAID physical adapter (hardware card).
Need to Install ‘mdadm‘ package: The mdadm is a small program, which will allow us to configure and manage RAID devices in Linux.
check my youtube video "Creating RAID-1 (Mirroring) in Linux || Configure RAID 1 array " for your reference.
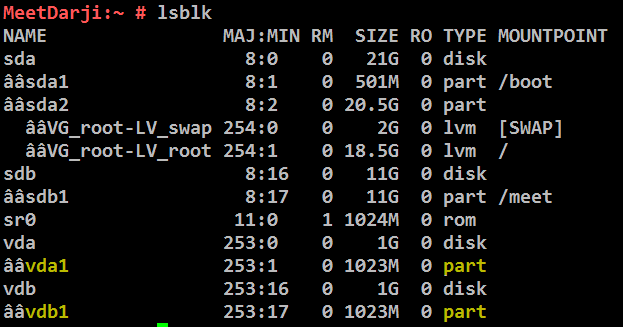
Creating partitions for RAID 1
Now create 2 partitions for raid, with the help of following commands.
#fdisk /dev/vd*
- Press ‘n‘ for creating a new partition.
- Then choose ‘P‘ for Primary partition.
- Next, select the partition number as 1.
- Give the default value by just pressing two times Enter key.
- Next press ‘P‘ to print the defined partition.
Please follow the same above instructions to create a partition on sd*(2) drive.
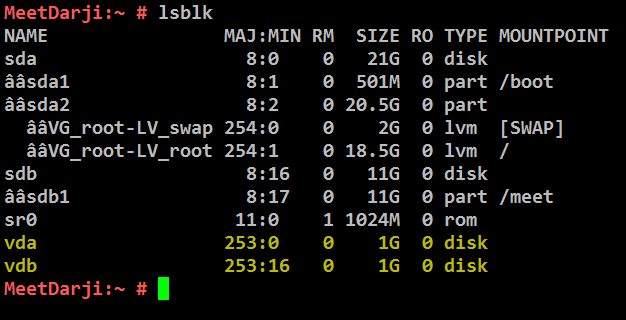
After creating partitions, verify both the drivers are correctly defined for RAID using the following commands.
Configure software raid 1
Now since we have all the partitions with us, we will create a software RAID 1 array on those partitions, with the help of following commands.
#mdadm -Cv -l1 -n2 /dev/md0 /dev/vd{a,b}1
-C, --create (Create a new array.)
-v, --verbose (Be more verbose about what is happening.)
-l, --level= (Set RAID level.)
-c, --chunk= (Specify chunk size of kilobytes.)
-n, --raid-devices= (Specify the number of active devices in the array.)
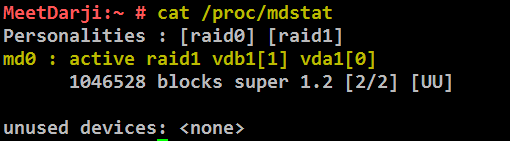
Now since our raid 1 array is created successfully. Verify the changes using below command
# cat /proc/mdstat
Create file-system and mount point
raid 1 array is ready, we will create a filesystem on top of
/dev/md0 so it can be used for storing data.
#mkfs.xfs -f /dev/md0
To check the detail of the software raid 1 array you can use below command
# mdadm --detail /dev/md0
Once xfs filesystem has been created for Raid device, now create a mount point directory and mount the device /dev/md0 under it.
# mkdir /raid1
# mount /dev/md0 /raid1/
# mkdir /raid1
# mount /dev/md0 /raid1/
Next, verify that the device /dev/md0 is mounted under /raid1 directory.
#df -hT
Once you’ve verified mount points, it’s time to create an fstab entry in /etc/fstab file.
# vim /etc/fstab
Add the following entry as described. May vary according to your mount location and filesystem you using.
/dev/md0 /raid1 xfs defaults 0 0
Run mount ‘-a‘ to check if there is any error in fstab entry.
# mount -a
That’s it, we have seen here, how to configure RAID1 (Mirroring) with raid levels by using two hard disks. In the next article, we will see how to setup RAID5.

That’s it, we have seen here, how to configure RAID1 (Mirroring) with raid levels by using two hard disks. In the next article, we will see how to setup RAID5.
check my youtube video "Creating RAID-1 (Mirroring) in Linux || Configure RAID 1 array " for your reference.


Comments
Post a Comment